Changing NTP Settings on ESXi Hosts is an article that shows an automated approach to changing the NTP client configurations on all connected ESXi hosts under the same vCenter Server, using a Python script.
The idea is to use a Linux CentOS 9 as a script server. We’ll execute a Python script from this server to connect to each ESXi host and upgrade the VMware Tools.
So, let’s get started:
1- Install CentOS 9 (without GUI) – We have tested it with CentOS 9, but feel free to install a different Linux flavor and adjust the script to run on it.
2- Access it by SSH with root rights and install Python:
curl -O https://raw.githubusercontent.com/danchiacchio/scripts/refs/heads/main/sh_PythonInstall/install-python.sh

chmod +x install-python.sh

./install-python.sh
Grab a coffee and wait for a while. The automated Python install takes a while to complete! ☕
3- Creating a working directory (something such as /root/scripts/py_vESXiNTPd) – you can choose the directory name:
mkdir -p /root/scripts/py_vESXiNTPd4- Go to the working directory and download the Python script “py_ESXiNTPd.py”:
cd /root/scripts/py_vESXiNTPd

curl -O https://raw.githubusercontent.com/danchiacchio/scripts/refs/heads/main/py_vESXiNTPd/py_ESXiNTPd.py

pip install pyvmomi paramiko prettytable
5- Creating the NTP client configuration file:
touch ntp_config.txtAnd adding content into it – this is an example of NTP client configuration for an ESXi host – Adjust it to satisfy your needs:
restrict default nomodify notrap nopeer noquery
restrict 127.0.0.1
restrict -6 ::1
driftfile /etc/ntp.drift
logconfig +clockstatus +peerstatus +sysstatus +syncstatus
server 192.168.255.3
tos maxdist 30
6- Run the Python script:
chmod 700 py_ESXiNTPd.py
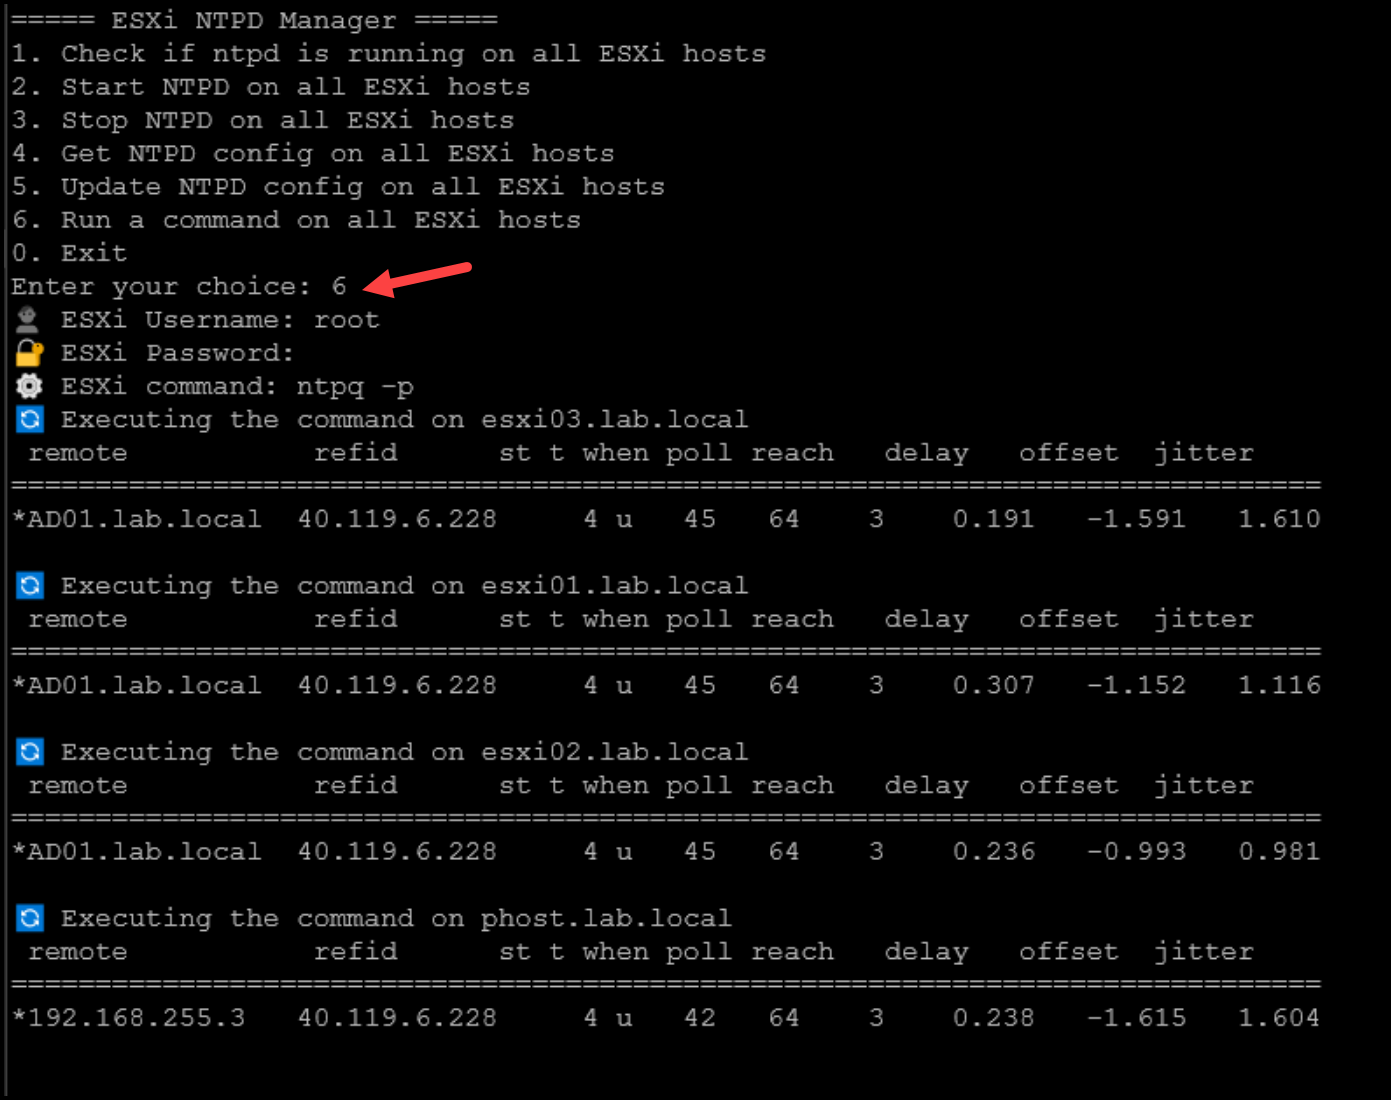
python py_ESXiNTPd.py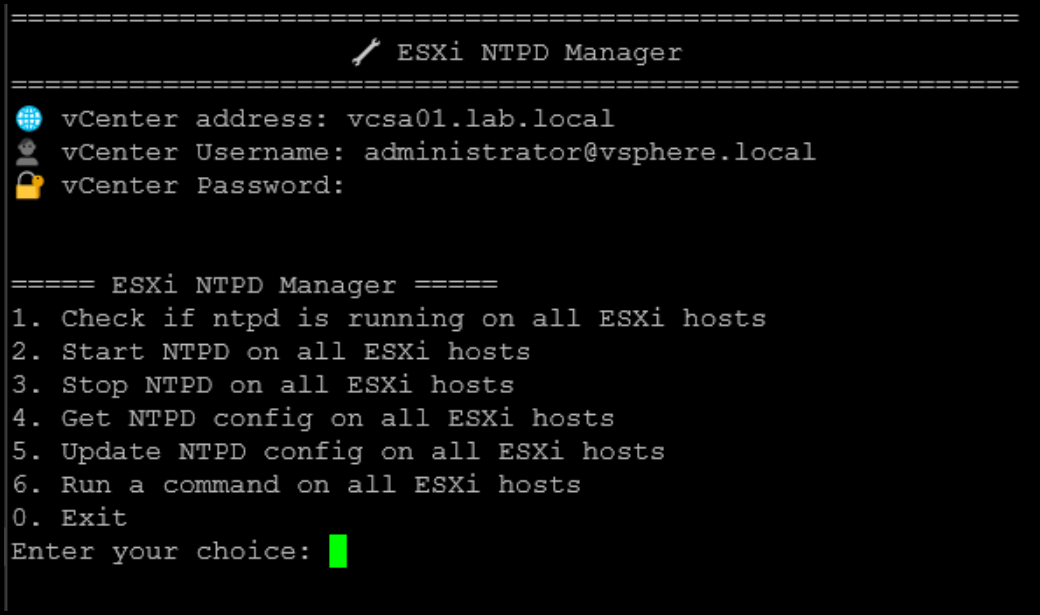
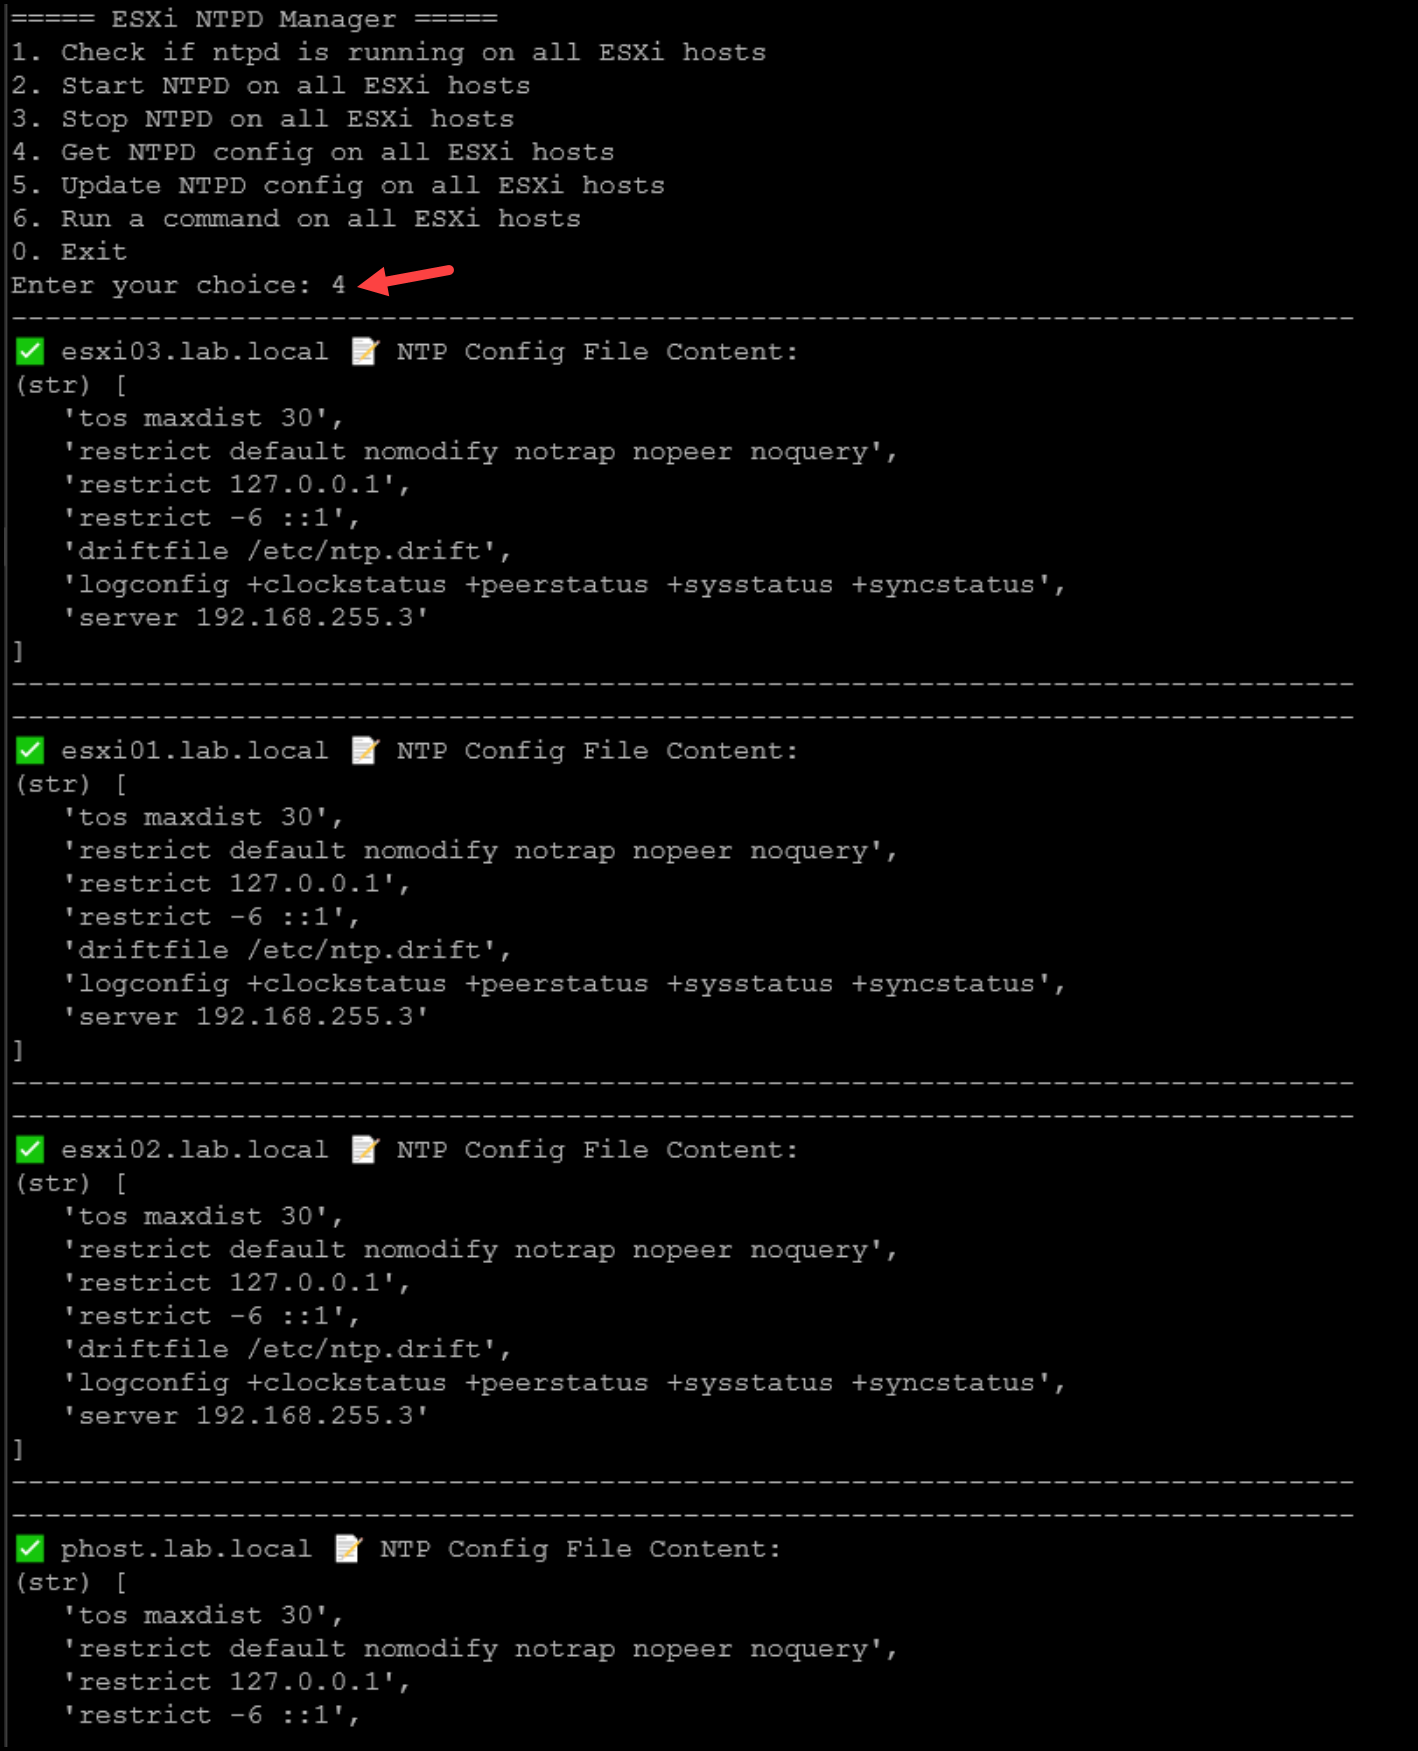
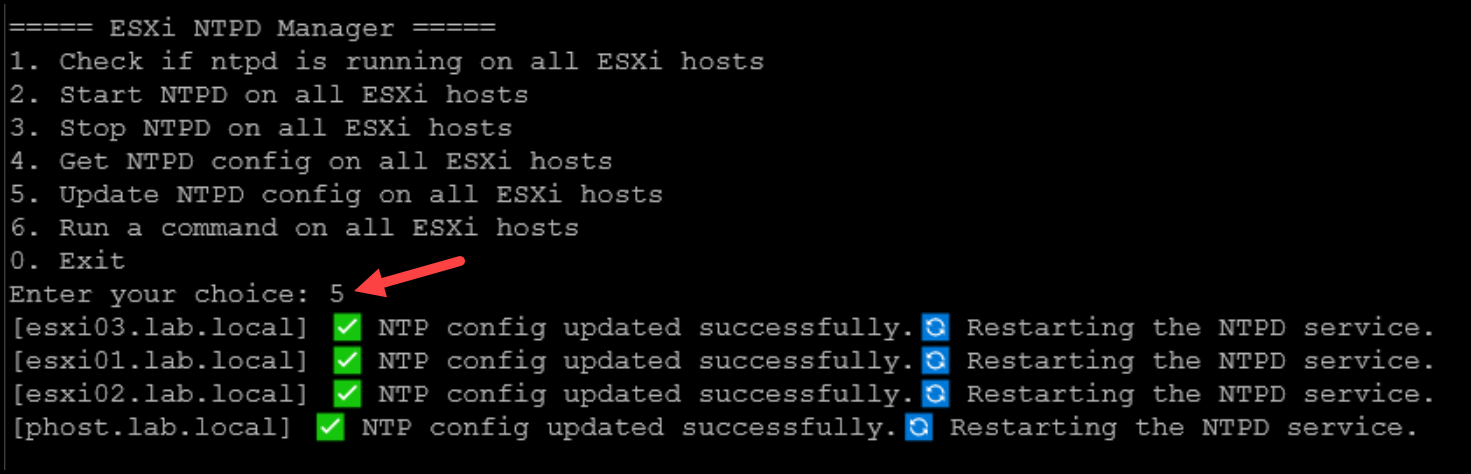
For option 5, “Update NTPD config on all ESXi hosts”, the script is pre-configured to read the NTP config under the /root/scripts/py_vESXiNTPd working directory. If the file is not found, an error like that will be shown:

After fixing it:
That’s it 😉
Note: So, I tested it several times in a lab environment, and it worked as expected. However, be careful when executing it in a production environment. We’ll not be responsible for downtime or weird behavior in your environment!