Setting Up a DHCP Relay on VyOS shows how to configure a DHCP Relay on the VyOS router.
We have written some articles about VyOS, and we’d like to share them if you:
How to Install VyOS Router in a Lab Environment:
https://www.dpcvirtualtips.com/how-to-install-vyos-router-in-a-lab-environment/
Performing Basic Configurations on the VyOS:
https://www.dpcvirtualtips.com/performing-basic-configurations-on-the-vyos/
First and foremost: What is DHCP Relay?
A DHCP Relay is a network service that forwards DHCP requests from clients on one network to a DHCP server on another network (different broadcast domains).
Since DHCP uses broadcast messages that don’t cross routers, a DHCP relay listens for these broadcasts and relays them to a DHCP server using unicast – allowing clients to get IP addresses even if the server is not on the same subnet.
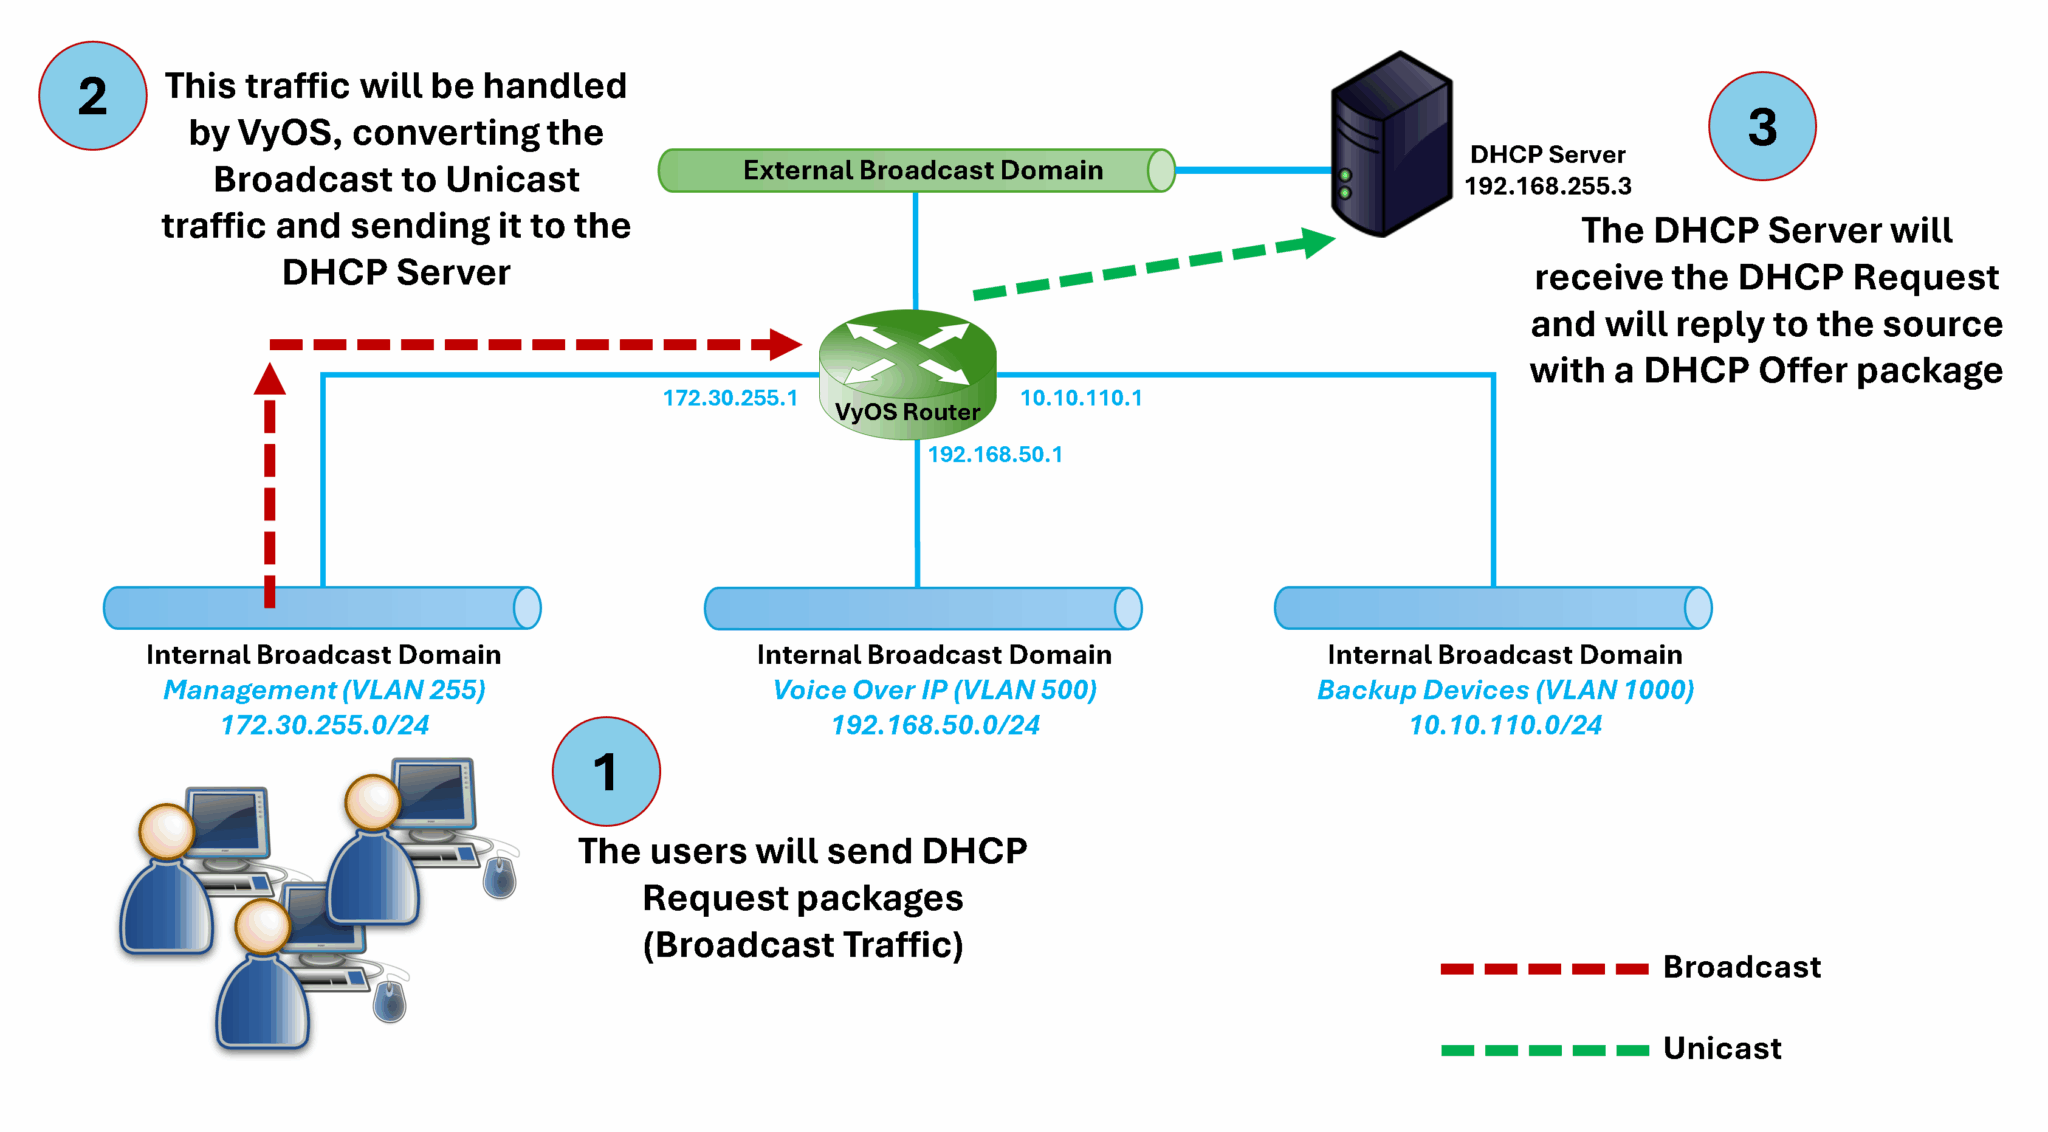
How does it work?
In the following picture, we can see an example topology illustrating how a DHCP Relay works:
How can I configure DHCP Relay on the VyOS?
The DHCP Relay configuration is pretty straightforward on the VyOS:
1- The first step is to identify all VyOS interfaces related to the DHCP Relay process.
Using the provided topology, users or clients are connected to VyOS via the interface “eth1.255”.
The exit interface to reach the DHCP Server is the interface “eth0”.
2- The next step is to connect to the VyOS router and apply the following configuration:
set service dhcp-relay listen-interface 'eth1.255'
set service dhcp-relay server '192.168.255.3'
set service dhcp-relay upstream-interface 'eth0'
3- Commit the configuration, save, and exit:
commit
save
exit
That’s it 🙂